Showing posts with label side dish. Show all posts

Wednesday, July 15, 2009

Orzo Salad


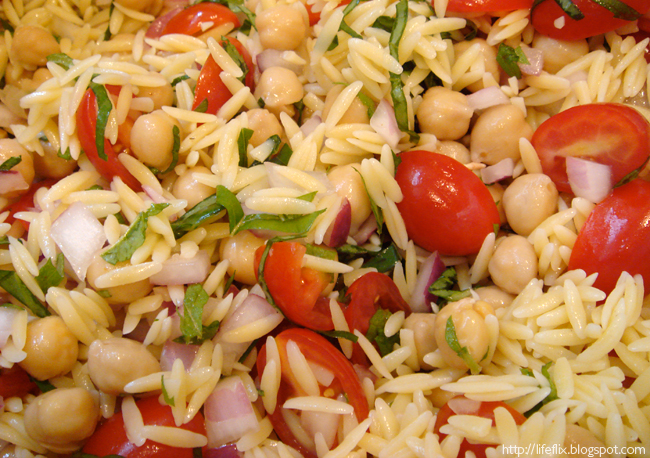
My friend Karen suggested I give this recipe Orzo Salad a try. I ended up making it for a little picnic with friends last week. I marinated the chopped onions in the vinaigrette while I prepared the rest of the dish - my attempt to pickle them. I added feta cheese (cubed), it was so freakin good. My only complaint is that the mint didn't do a good enough job at masking the onion breath (next time I might chop up the onions a little smaller as instructed AND soak them in some water prior to the pickling step). I find that soaking helps with the raw-harsh factor.

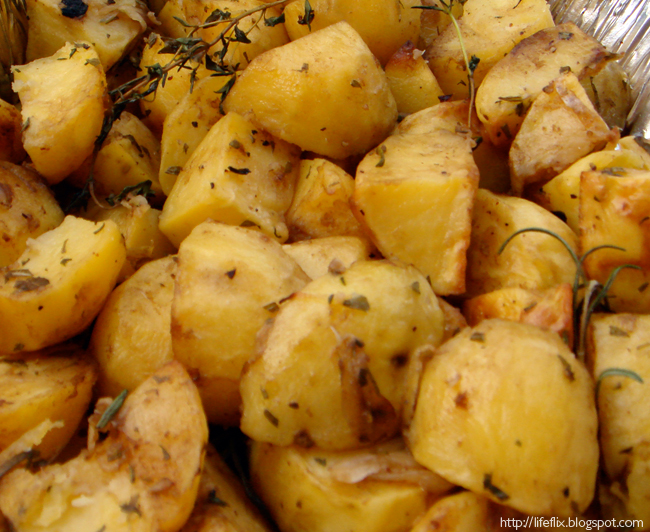
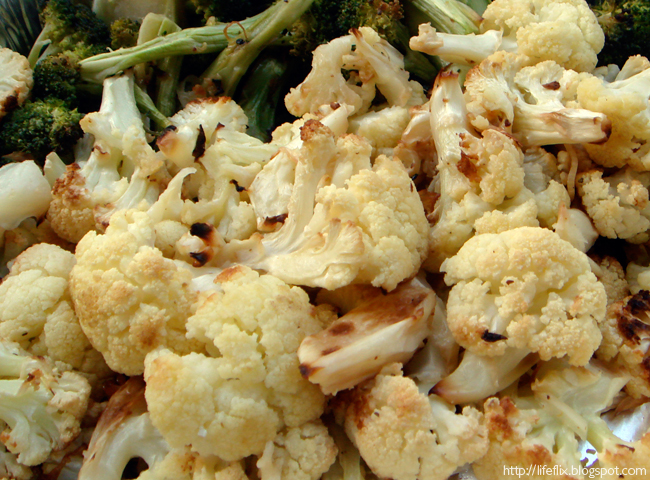
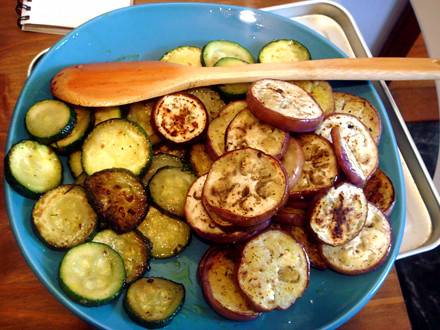
Served with roasted veggies...


Tuesday, July 29, 2008

Last Night's Dinner #122: Tangy Potatoes


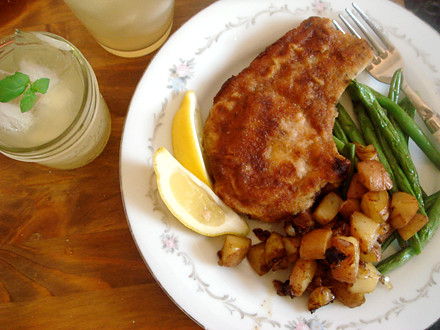
Sorry for the pork chop repeat but we're testing out a couple of different pork suppliers so I have to cook the chops the same exact way!! However, I did whip up a new side dish inspired by a recent Lidia's Italy episode.

It's actually pretty easy - if you love Diner homefries then you'll love this...

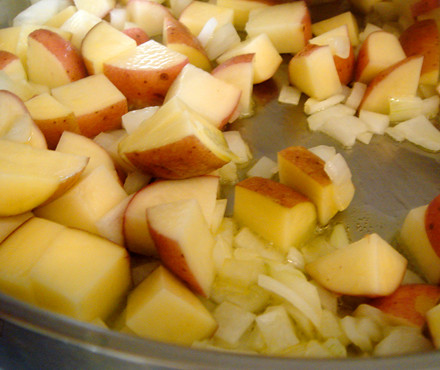
Chop up potatoes into small cubes (you can remove the skin if you prefer it that way). I used (5) new potatoes, but I'm sure it'll work with any kind of potato. Chop up white onions (about 3/4 the amount of potatoes).

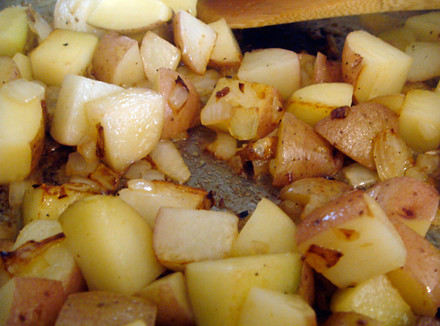
Cover the bottom of the pan with olive oil and start browning the onions and potatoes. Season well with salt. You want to keep an eye on this one and stir often so it doesn't burn and stick to the bottom of the pan.

Once you notice that it's starting to get some color, lower your heat and sprinkle in some sugar (not too much), mix and cover with a lid. Wait about a minute or so (be careful, sugar will caramelize quite quickly) and add about 2-3 tbs of water to the pan to add some steam and to help along the cooking process.

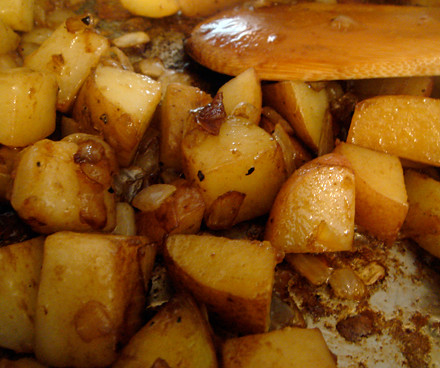
Once it dries up again, drizzle in some balsamic vinegar and mix it all in. You might have to add more water - if it looks like it's getting too dark and the potatoes aren't cooked yet, just sprinkle in some more water and cover with a lid. Make sure you put enough salt - potatoes are salt-guzzlers and you might think it's too much but go ahead and taste them as you go.

The balsamic vinegar + sugar + salt is a great combo! This would be great with your morning eggs or add some sausage meat and serve with a simple salad for lunch.

Thursday, May 1, 2008

Last Night's Dinner #112: Cumin & Lime Roasted Corn on the Cob & No-fry Fried Chicken


I haven't made Karen's No-Fry Fried Chicken in a while so I busted it out last night along with some Cumin & Lime Roasted Corn on the Cob. This would've probably been ten times better with Cotija (Queso Anejado) Cheese but I didn't have any and couldn't be bothered to go outside again.

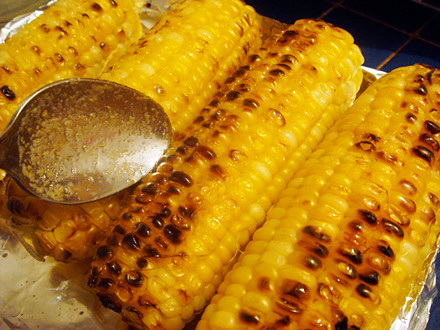
I dropped the corn into some boiling water and cooked it for about 3.5 minutes. I kept them into a strainer and allowed them to dry for about an hour (probably not necessary). I then cranked up the broiler and in the meantime melted about 2 tablespoons of unsalted butter, and added to it... a couple pinches of salt, a pinch or two of cumin, and a dash of cayenne pepper.


Brush the cobs with a tiny bit of the butter mixture (reserve the rest) and broil the corn until nicely charred (turning to get even charring). Squeeze in about 1/2 lime into the butter mixture and mix. Drizzle remaining butter/lime mixture over grilled corn. Yum.

No Fry Fried Chicken:

I've changed a couple of things on the original recipe.


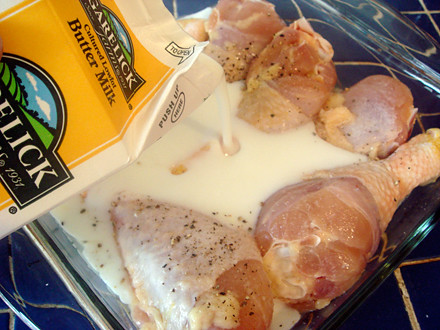
I allow the drumsticks to sit in some buttermilk for a couple of hours


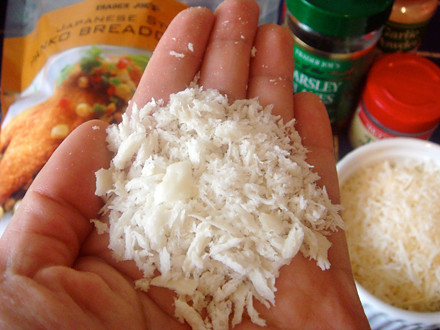
Panko breading gives it a crunchier crust - mix about 2 cups of Panko with 1 cup of freshly grated Parmesan cheese (you can use the pre-grated stuff, but Karen thinks you get a better browning if you use freshly grounded) - I haven't tried the pre-grated stuff, so I'm not sure. Add whatever dry spices you have - I added about a teaspoon and a half of salt, pinch of pepper, two teaspoons of dried parsley, oregano, thyme, pinch of garlic powder, and a pinch of paprika.


Probably not necessary since they've been sitting in buttermilk all afternoon (in the fridge), but I dipped the chicken in egg then coated it with the panko mixture. Really piling it on. I press the breading into the chicken with my palms to make sure I get an ice thick layer.

It's important to use a rack so the chicken can crisp up all around. Transfer into a preheated 400 F degree oven. Cook for about an hour, depending on how big your pieces are. I like to turn the pieces every 25 minutes, giving them a nice even tan.

Friday, March 21, 2008

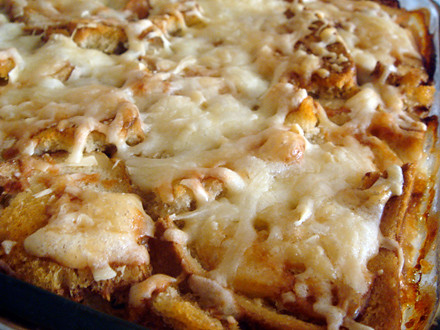
Last Night's Dinner #98: Cheesiest Potato Casserole


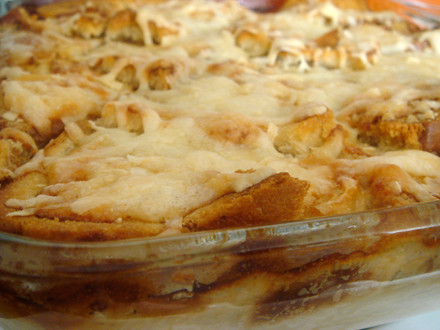
This doesn't even need an intro, just look at all that yummy melted cheese!

Recipe from Cook's Country
Serves 8 to 10
4 garlic cloves, 1 clove cut in half lengthwise, remaining cloves minced
1 tbs unsalted butter, softened
1 cup shredded gruyére or swiss cheese
1 cup coarsely grated Parmesan cheese
1 1/2 cups heavy cream
1 1/2 cups low-sodium chicken broth
2 teaspoons chopped fresh thyme
1/8 tsp nutmeg
3/4 tsp salt
1/8 tsp pepper
2 1/2 pounds russet potatoes (4 to 5 medium) peeled and sliced as 1/8" thick
4-5 slices of hearty white sandwich bread (Arnold Country or Pepperidge Farm works best), torn into pieces.


Preheat oven to 350 F degress. Adjust oven rack to middle position.

Use cut side of halved garlic to rub sides and bottom of 2-quart shallow baking or gratin dish. Allow garlic in dish to try then coat dish with softened butter. Combine cheeses in a small bowl.

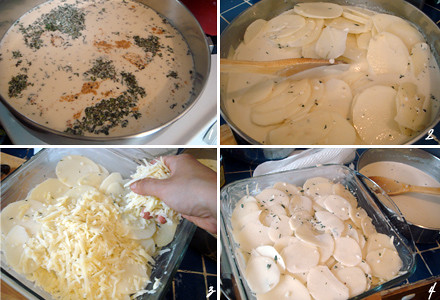
Bring minced garlic, cream, broth, thyme, nutmeg, salt and pepper to boil in large saucepan over medium-high heat. Reduce heat to medium low and simmer until liquid reduced to 2 1/2 cups, about 5 minutes. Remove from heat and gently stir in potatoes.


Spoon half of potato mixture into prepared dish. Sprinkle with half of cheese, add remaining potato mixture, and press with spatula to compact.

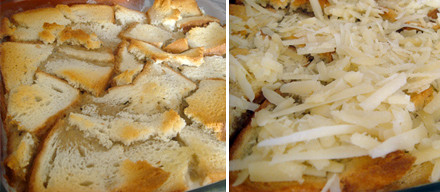
Press bread pieces into casserole. Bake 40 minutes.


Sprinkle remaining cheese on top and continue baking until golden and bubbling, 25 to 30 minutes. Remove from oven and let rest 20 minutes before serving.

Tuesday, November 20, 2007

Last Night's Dinner #63: Baked Fennel Topped with Parmigiano Reggiano


Three main ingredients, easy to make but (oh) so good!
A perfect side dish for pasta or serve it as an appetizer.

You'll need:
(serves 2)
1 fennel bulb, cut into 1/3" slices (cut bulb horizontally)
1/3 to 1/2 cup Parmigiano-Reggiano, freshly grated
2 tbs olive oil
butter for greasing *optional
salt & pepper to taste

Peheat oven 375F degreees

- Trim fennel and only use the main bulb, reserve about a tsp of frawns (chopped).
- Grease the glass or enamel baking dish with olive oil or butter. You want the dish large enough so that every piece of fennel touches the bottom of the pan.
- Lay out the slices on the dish and season with salt and pepper. Drizzle with olive oil. Top with shredded cheese. Cook for about 45-50 minutes.

Some people like to add garlic, I'm sure that can't hurt but I didn't add any to mine. You might also want to add additional cheese at the very end. Have a peek at the 30 minute mark and see if it could use more cheese.

Sprinkle frawns on top before serving.

Monday, October 22, 2007

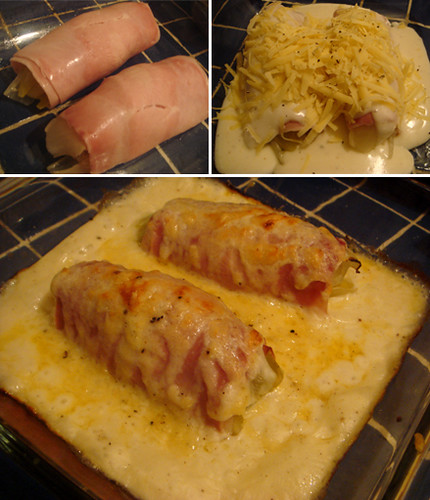
Last Night's Dinner #44: Gratin d'endives au jambon


Gratin d'endives au jambon
Recipe courtesy of cookingninja.com
Prep: 5 mins
Total: 25 mins

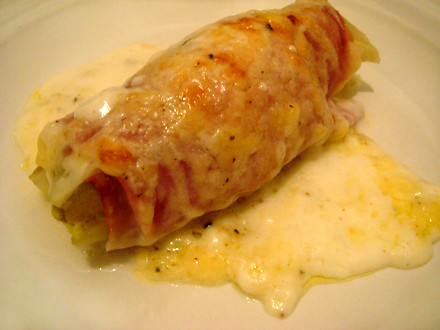
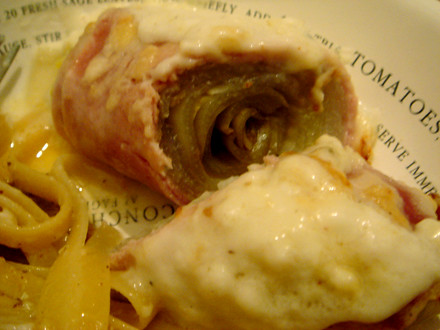
This is a great recipe for endives. The saltiness of the ham is a nice balance to the slight bitterness of the endive. Oh, and let's not even talk about the richness and creaminess of the béchamel sauce and the shredded gruyère cheese topping!


Get full recipe and instructions at cookingninja.com

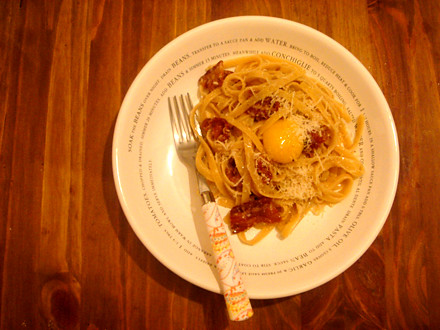
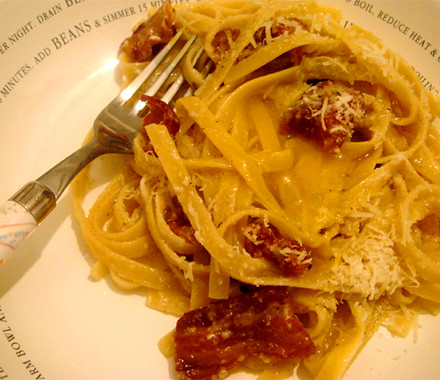
I also made one of my favorite easy pasta dishes - Spaghetti alla Carbonara.


Unfortunately, I had to use Tagliatelli because I ran out of Spaghetti. It's not as good with Tagliatelli because it's a little too much pasta for the simple "sauce".

Thursday, October 18, 2007

Last Night's Dinner #42: Cast Iron my ass...


Grilled Pork Chops with Peaches and Balsamic Vinegar
(Served with Broccolini)
Recipe from The Babbo Cookbook
Prep: 5 mins
Total 20 mins
Difficulty: Easy

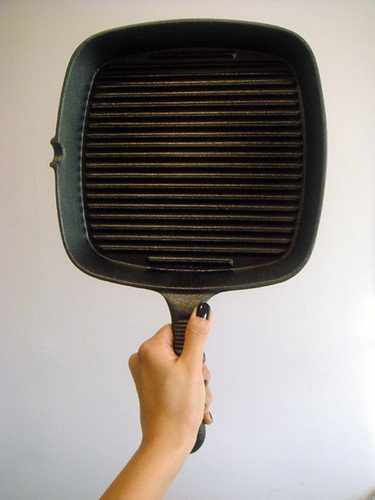
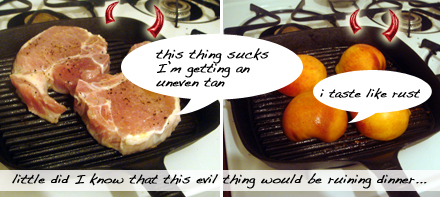
I bought a new cast iron pan yesterday, to serve as a "grill". I know I just got a pan, but I wanted the "grill" marks =)


You can use the broiler too, but my broiler isn't exactly user-friendly so I opted for pan grilling. BIG-BIG-HUGE MISTAKE!!!!


Yes, I did get the lovely grill marks but that's not all I got from this freakin' pan. It made everything taste like rust, especially the peaches! The heat distribution was non-existent so the pork chops were unevenly cooked and was far from tender.

Lesson learned: never ever buy a cheap "cast iron" pan.

I was so disappointed, I had such high hopes for this recipe.


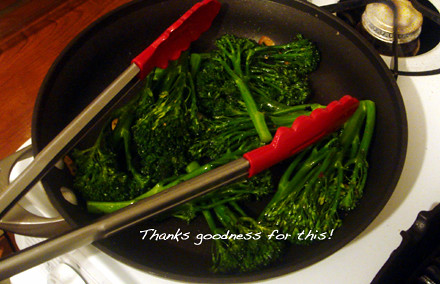
Thank goodness for the broccolini - it was the only thing that was edible. Why? Because I didn't use the evil pan to cook it.

It's still a great recipe, so here it is. I hope you have better luck with it!

You'll need:
Serves 2
2 8oz, double-cut pork chops (pretty thick cut, bone-in or boneless)
1/4 cup kosher salt, plus more to taste
1/8 cup sugar, plus more to taste
2 fresh peaches, halved and pitted
1/4 cup extra virgin olive oil
freshly ground black pepper
best-quality balsamic vinegar* for drizzling
broccoli rabe with garlic (recipe below)

*If you don't have expensive aged balsamic vinegar, you can fake it. In a small saucepan over medium heat, combine 1 cup of apple juice, 4 tablespoons of balsamic vinegar, and 4 tablespoons sugar. Bring mixture just to a boil and immediately reduce heat to medium-low. Continue cooking until liquid has reduced by half, about 20 minutes.

Note: Italians are not known to mix fruit with meat, but they do love the peach and balsamic vinegar combo - so this dish is a melting pot of two different ideas. Batali also uses a brining trick (soaking chops in salty/sugar mixture overnight) that makes the pork even more juicier and tender. The word brining initially scared me, but it's really just throwing in salt and sugar in water -- done.

step 1. In a deep bowl, combine the salt, sugar and about 1 quart (4 cups) of water and mix well. Add the chops and let them brine in the refrigerator for 12 hours or overnight.

step 2. Prepare a grill or broiler

step 3. Brush each pork chop and peach section with oil ,season both with salt and pepper and set the peaches aside.

step 4. While the second side cooks, place the peach halves on the grill and cook until lightly charred and juicy.

step 5. Place a mound of broccoli rabe (the broccolini looked fresher in the market so I made those instead) on each plate and top with one pork chop. Garnish with the peach halves, drizzle both pork and peaches with the balsamic vinegar, and serve immediately.

Broccolini
I just heated up a tablespoon of olive oil and cooked two thinly sliced garlic cloves for a minute or two (careful not to burn), added a pinch of crushed peppers then added a bunch of broccolini (stems cut off). The original recipe used anchovy fillets but I used a dash of fish sauce instead. If you don't have fish sauce you can simply use salt and pepper for seasoning. You might want to add a splash of water to help create steam if you prefer it more cooked.

Monday, October 8, 2007

Last Night's Dinner #36: S'MAC Mozzarella MAC


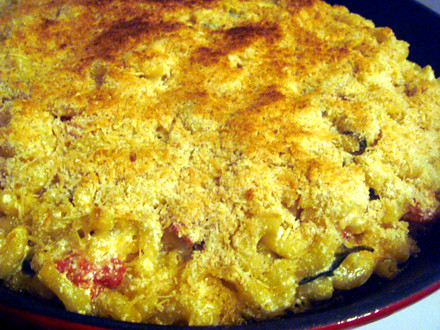
I used my new cast iron skillet =)

S'MAC Mozzarella MAC
Prep time: 20 mins
Cooking time 30 mins
Difficulty: Easy

I found this great recipe on the S'MAC website and finally tried it last night. It's a combination of muenster, mozzarella, pecorino romano, and roasted tomatoes & garlic -- so good. Check out step-by-step video instructions. Download recipe .pdf .doc .txt

I'm going to order this next week and see how well I did compared to the original.


By the way, you should put it in the broiler for a few minutes prior to serving so the top gets nice and brown!

Tuesday, September 18, 2007

Last Night's Dinner #29: Pasta al Limone & Millefeuilles


My goal this week is to use up ingredients that I have in the fridge and pantry. I tend to go nuts at the grocery store and have been taking way too many trips to Whole Foods. So as a challenge to myself, I can only cook with ingredients that I already have (yikes!)

So last night, I made the most simple pasta dish that you can possibly make - well that's a lie because my grandmother actually used to feed us spaghetti and butter as an after school snack... hmmm, maybe I'll make that tonight ;-)

Pasta al Limone
Recipe adapted from travelingtoitaly.com
Prep time: 5 mins
Cooking time: 7 mins
Difficulty: Extremely easy

You'll need:
1/2 package of spaghetti
5 tablespoons cream
1 tablesoon butter
Salt and pepper to taste
Zest of 1 lemon finely grated
3 tablespoons extra virgin olive oil
Juice from 2 lemons (adjust according to size)
1 1/2 cups freshly-grated Parmesan Reggiano
1 garlic cloves finely chopped
10 Kalamata olives cut into small slivers (optional)
1/4 cup fresh basil leaves, torn into pieces

Cook the pasta in rapidly boiling salted water until al dente, then drain.
Toss with cream, butter, then with salt, pepper and lemon zest.
Working quickly, toss with the olive oil, lemon juice, Parmesan Reggiano, garlic and olives. Transfer to a serving dish and scatter with the basil.
Add a thin stream of excellent Extra Virgin Olive Oil
Serve at once, with extra lemon and Parmesan for those who desire it.

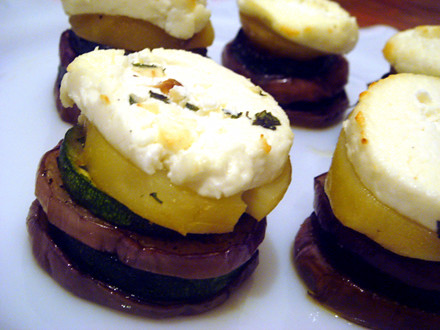
Eggplant, Zucchini and Goat Cheese Millefeuilles


I also prepared a simple appetizer because I had to get rid of the eggplant, zucchini and a lonely potato in the fridge. Lucky for me, I found a great recipe for Eggplant, Zucchini, Potato and Cheese Millefeuilles from one of my favorite food blogs La Tartine Gourmande. I'm mildly allergic to eggplants (they make my lips/mouth itchy) but I manage to ignore the reaction because I love them so much - wow that sounds like an abusive relationship.


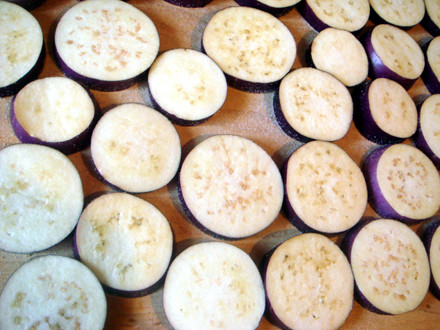
TIP: Most eggplant recipes will ask you to salt the eggplant for a minimum of 30 minutes then either rinse off or rub off with paper towels - this supposedly removes the bitter taste. I personally don't think eggplant is bitter but I do approve of the process because I find that it makes the eggplant more absorbent. You end up having to use less oil and instantly absorbs more of the flavors.

Friday, August 31, 2007

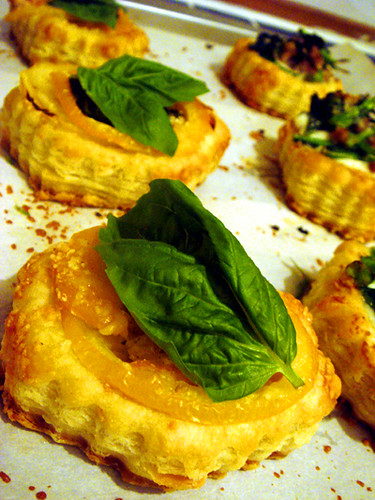
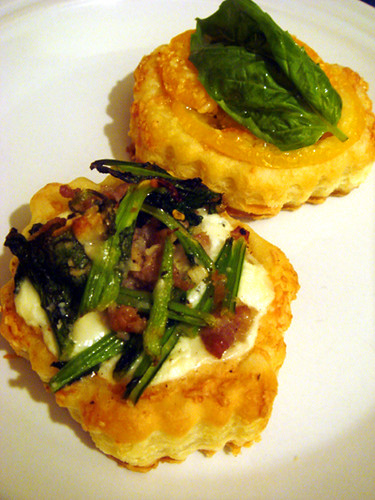
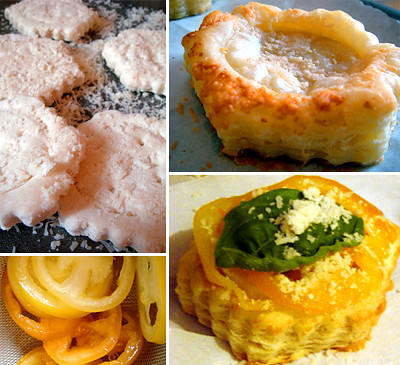
Last Night's Dinner #21: Pizza Puff Duo & Lonely Peach Tatin

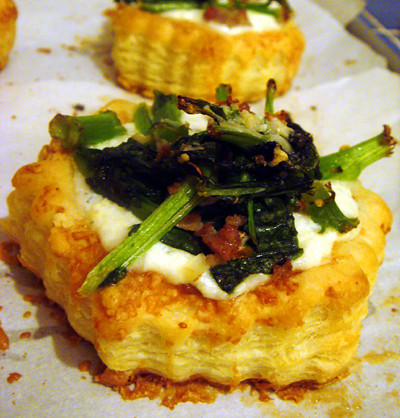
So since I had lots of left-over filling from Wednesday's calzone meal, I decided to tweak last night's dinner. The original plan was to only make tomato parmesan puffs, but instead I decided to make one more type using the leftover filling.


PIZZA PUFF DUO
Difficulty: Really Easy
Prep time: 20 minutes
Cooking time: 25 minutes (split into two sessions)


You'll need:
- Olive oil for drizzling
- fresh basil leaves
- 1 tomato (pick a nice one!) sliced into thin rounds, as thin as you can get them and remove seeds
- 1 cup freshly grated parmesan cheese
- Puff pastry (I used 6 store-bought puff pastry shells, I couldn't find the regular kind)
- coarse salt and pepper to taste

Preheat oven at 400F.
Thaw out the puff pastry if frozen for about 20 minutes.


Step. 1 Once soft to touch, spread out shells on a cutting board or counter.
Step 2. Sprinkle about 1/4 of the grated parmesan over the shells and gently pat it down with your hands so that the cheese sticks to the dough. Turn over the shells and repeat - make sure you get the sides too. Transfer shells to a parchment lined baking sheet.
Step 3. Bake for 10 mins or until just golden. Don't cook them all the way as the package suggests because you'll put them back in the oven once topped. Let the shells cool down.
Step 4. Make sure your tomato slices are dry (pat down with paper towel to get as much of the natural moisture off), place 2 slices on each shell and sprinkle with grated parmesan. You can also add a couple of leaves of fresh basil if you have some around.
Step 5. Cook for 10 minutes or until cheese is nice and golden.
Step 6. Drizzle with olive oil before serving, add a fresh basil leaf and grind some fresh black pepper and coarse salt.

The other kind I made used the cheese & meat filling from Wednesday night, it was really good!


LONELY PEACH TATIN


The inspiration...


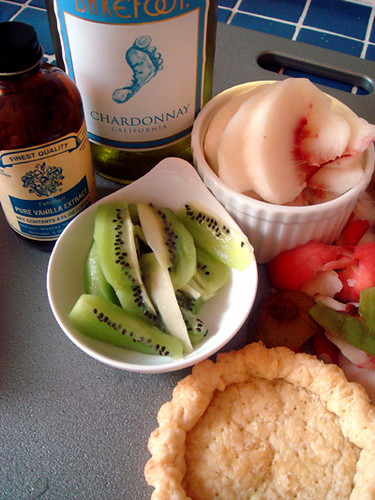
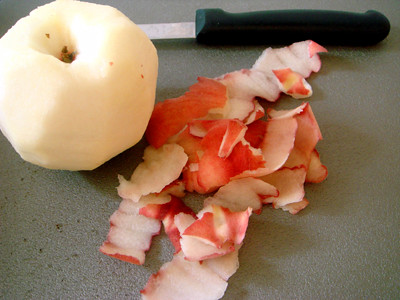
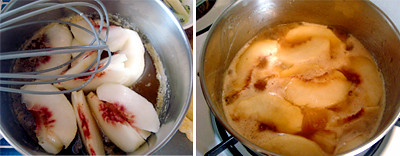
I was going through the fridge looking for something to eat and this lonely peach caught my eye. I wasn't really in the mood to munch on a peach so I thought what a great opportunity to try something new. I'm currently obsessed with pies and tarts so I immediately think pie! I didn't want to go nuts and come up with a filling so I thought making a tart tatin-inspired tart would do the trick. I was also lucky enough to have one tart crust in the freezer left over from my dulce de leche tartlettes. Unfortunately it was already cooked, so I couldn't make an authentic tatin (upside down). I've seen plenty of recipes where the fruit is gently poached in a butter and sugar mixture; other recipes use a white wine based sauce. I really wanted to combine the two ideas...


I wasn't sure if I could combine the two, so I first made a sauce using equal parts of sugar and butter. I didn't want to ruin the entire batch, so I took a spoonful of it and placed it in a tiny bowl and mixed in a splash of chardonnay. Tasted good to me! So I added about 2 tbs of wine to my butter and sugar mixture. It wasn't exactly a tatin - I got a little carried away with fanning the peach slices. It was good but I think I have to make some minor adjustments before sharing the recipe! I served it with vanilla ice-cream, I guess a dallop of Crème fraîche would've been good too.

Wednesday, August 29, 2007

Last Night's Dinner #19: Tapas Night

Tapas Night
:: Chorizo braised in hard cider
:: Tortilla (Spanish Potato Omelette)
:: Shrimp in Garlic Olive Oil
:: White Sangria
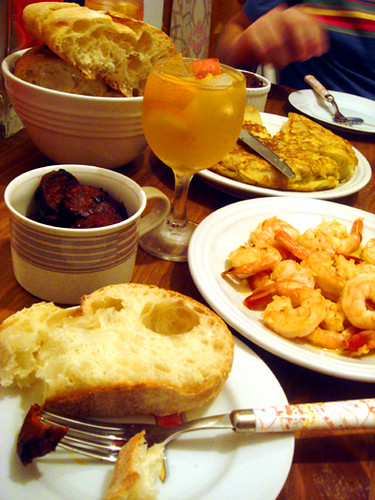


This dinner was one of the best meals that I've ever made and it was fairly easy - so I urge you to give it a shot. Try it as a Saturday night special if you don't have time during the week. I'm also including little tips I learned along the way at the very bottom. Enjoy!

Each recipe serves 2:
one guy and one girl, or three girls possibly 4 if they eat like birds


Chorizo braised in hard cider
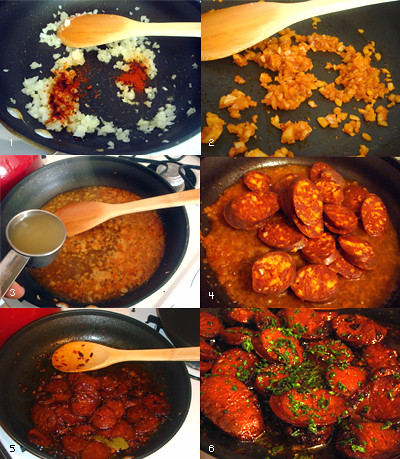

You'll need:
- Chorizo (5oz, I used 3/4 of what I bought), cut into 1/4" diagonal slices
- 1/2 cup of hard cider (you can also use a combo of beer and apple juice if you can't find hard cider)
- 1/4 cup of chicken broth
- 2 tbs parsley, finely chopped
- 1 bay leaf
- 1 tbs olive oil
- 1/2 tsp smoked paprika
- 1 tbs of sherry vinegar (optional)

Step 1. Cut chorizo diagonally into 1/4" pieces and set aside.
Step 2. Heat up olive oil and cook onions for 3-4 minutes then add paprika and cook for another minute or so (image 1).
Step 3. Add hard cider and allow to simmer for a minute then add the broth. Lower the heat and allow the liquid to reduce by a third.
Step 4. Once the mixture is reduced, add the chorizo and simmer. You'll notice that the liquid will slowly evaporate and the natural oil from the chorizo will begin the browning process (image 5). I prefer my chorizo slightly well done (edges a little burnt). You'll know when it's done.
Step 5. Pour the sherry vinegar over the chorizo (optional) and add the parsley right before you turn off the heat.

Tortilla


You'll need:
- 4 large eggs
- 4 potatoes (I'm not sure what variety I used, it had light/thin skin - not Idaho, might've been Russett), sliced as thin as you can by hand
- 1/2 Spanish yellow onion, finely chopped
- 2 tbs olive oil
- salt to taste


Step 1. Crack eggs into a bowl and whisk lightly; don't over mix. Set aside.
Step 2. Peel and cut potatoes into very thin rounds (image 1). Season well with salt. Finely mince the onion.
Step 3. Heat up a little more than 1/2 tbs of olive oil in a large skillet (preferably non-stick). Add potatoes. You have to be careful not to add to much olive oil or you'll end up with fries. You want the potatoes to cook and not brown. You don't want them to be crispy so make sure you adjust the heat accordingly and keep mixing/turning so they don't brown and crisp up. The salt that you added should've created some moisture; the salt draws out the starch from the potatoes - you'll notice that the potatoes will get a little sticky.
Step 4. Once you notice the potatoes breaking naturally as you mix and turn (image 6), add the onions. At this point, you should also add the remaining olive oil little by little. The mixture should remain moist, so if you feel that you need more oil go ahead and up the amount. Again, just make sure they don't end up as homefries. No browning!!
Step 5. Once the potatoes and onions are soft, remove from heat and slowly add to the eggs. Step 6. Using a fork, partially mash up the potatoes (image 7) and allow to sit for 5-10 minutes so that the potatoes absorb some of the egg.
Step 7. In a smaller skillet (preferably non-stick) than the one you used to cook that potatoes - add a small amount of olive oil (1 tsp). Go grab a plate that's bigger than the skillet and put it within hand's reach.
Step 8. Pour the mixture into the pan and quickly stir for 30 seconds then leave it alone. In about 2-3 mins or when you feel like you'll be able to safely turn the omelette, take the plate and place it on top of the skillet then flip it upside down. The side that was just cooking should be visible. Now carefully slide it back into the pan, so that the other side can cook. You do this flipping thing 4 to 5 times. Be careful because it gets heavier and heavier with each flip! Make sure your flame is low so that the outside doesn't burn or brown too much - especially by flip #3.

Shrimp in Garlic Olive Oil


You'll need:
- dozen thawed uncooked shrimps with tails (I used frozen ones)
- two cloves of garlic finely chopped
- 4 tbs olive oil
- pinch of smoked paprika
- pinch of red pepper flakes (peperoncino)
- salt to taste

Don't heat up the pan before adding the oil this time, because you don't want the garlic to cook too quickly.

Step 1. Low heat, add the olive oil and garlic at the same time and heat up for about 3-4 mins.
Step 2. Add the shrimp and quickly follow up with the red pepper flakes, paprika and salt. Cook until it turns just about pink. Try not to overcook the shrimps and make sure that the garlic does not brown. Remove the pan from the heat every now and then to control the temperature.
Step 3. Remove from heat and plate shrimps with the olive oil and garlic. Finish with a splash of olive oil.

Oh and don't forget to serve warm crusty bread for sopping up garlic oil!!

Sangria
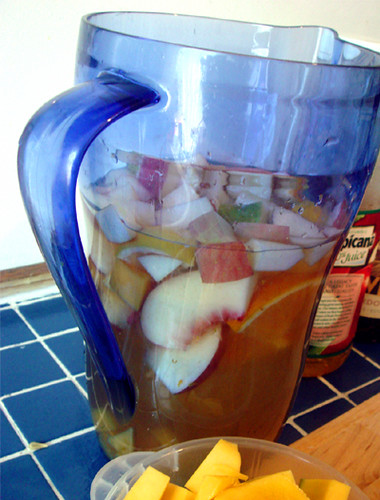

So as promised (if it turned out good)... it did!!!

**Make this one day before you plan to serve it. I know it's a pain in the butt it really makes a big huge difference!! It's worth the wait and effort.

- 1/2 gala or fuji apple, cut into cubes
- 1/2 riped mango, cut into cubes
- 1/2 riped peach, cut into slices
- 1 orange (half of it cut into bite-size 1/4 segments; other half will be juiced)
- 1 lemon (half of it cut into bite-size 1/4 segments; other half will be juiced)
- 1 tsp each of orange and lemon zest (zest the halves that will be used for juicing purposes)
- 1 bottle of dry white wine (I used Chardonnay - get a decent bottle, as much as I like Trader Joe's 2-buck chuck, spend the extra $4-5)
- 16 oz apple juice (I used Tropicana)
- 3/4 cup simple syrup (2:1 sugar/water ratio)
- splash of Cointreau* or another type of orange-based liquor (grand marnier* is also good)

Step 1. Pour wine into a pitcher and add zest of orange and lemon.
Step 2. Squeeze in the juice of half a lemon and half an orange.
Step 3. Add cut fruit, splash of Cointreau, 3/4 of the apple juice (save 1/4 to add right before you serve it), simple syrup. (You can add more or less, it really depends on your taste. I prefer my sangria sweet)
Step 4. Let nature do its business and leave it alone.
Step 5. Next day, mix it up and taste. See if you need/want to add the remaining apple juice. You can add more or less, again depends on your preference.

TIPS:
Sangria
- Put the glasses that you'll be using in the freezer for a couple of hours. You'll speed up the process if you add some water and ice cubes. It's a nice touch.
- If you really want to go the extra mile, pour some of the mixture into an ice-cube tray. This way, you don't water it down! I didn't go the extra mile and it was still good w/ water ice-cubes.
- Most corner liquor stores will have tiny bottles of liquor, so you don't have to buy a big bottle.
Shrimps
- Make sure that the shrimps are as dry as you can get them (use a paper towel to suck up as much water as possible) prior to cooking so that the olive oil doesn't become watered down.
Chorizo
- You can do steps 1 - 3 anytime and save the mixture until you're ready to cook the chorizo. Knowing that I would be too tired to cook after a 7pm spin class, I did steps 1-3 in the afternoon so all I had to do when I got home was add the chorizo and wait for it to brown. I also prepared the tortilla in the afternoon and just heated it up covered in foil in the toaster oven.