My friend Jenny asked me whether or not it took me a long time to maintain this site - I meekly said ya kind of (nodding my head up and down scrunching my nose). After putting this post together, I'd like to change my answer to a very very loud HELL YA! So please please please, I'm begging... please make it all worth while and someone (just one of you) give this one a shot! Pretty please?
This recipe is from Fran Bigelow's Pure Chocolate book - believe it or not, I once wanted to be a chocolatier (I'm being serious). I still have bars and bars of valrhona and callebaut in the freezer to prove it. I think this cake would make a fabulous Valentines Day surprise for your loved one (if he/she is a sweet tooth)! And if they don't appreciate it, just send them a link to this post.... that should set them straight =)
Anyway, I made this cake twice this month - for two separate birthdays. Just a warning though, if you're not a chocolate lover then this is NOT the right cake for you. It is intensely chocolate! It's like biting down on a big rectangle truffle. You'll need two types of chocolate - semisweet (52-62% cacao) and white chocolate. I would spend the money on good white chocolate (valrhona, callebaut if you can't find valrhona). Callebaut semisweet chocolate works just fine. Whole foods carries both brands.
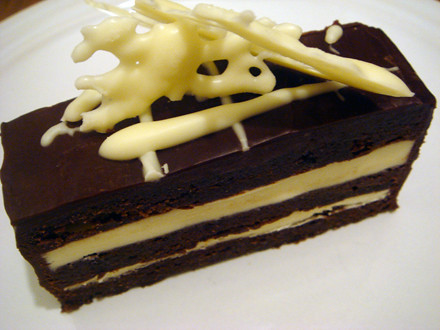
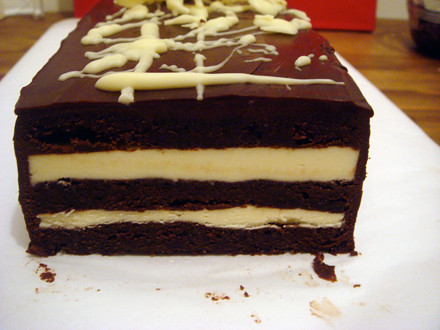
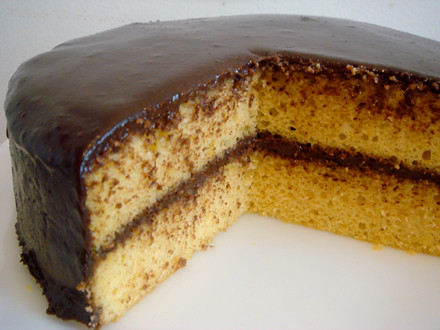
As you can see, it's a layered cake. I won't lie - it's a bit of work, but so worth it.
The work is divided into three main segments:
1. semisweet ganache frosting
2. white chocolate ganache filling
3. semisweet cake layers (flourless)
Oh, and the white chocolate for "writing".
IMPORTANT: One more thing - you need to start this at least 1 day before you need it.
Here's what I recommend doing...
THE PLAN

The day before...
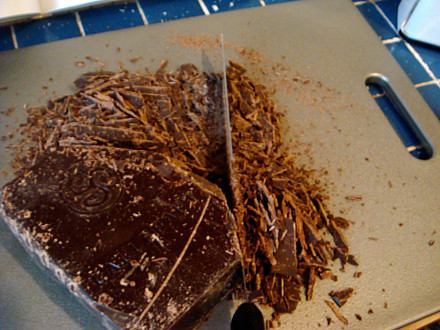
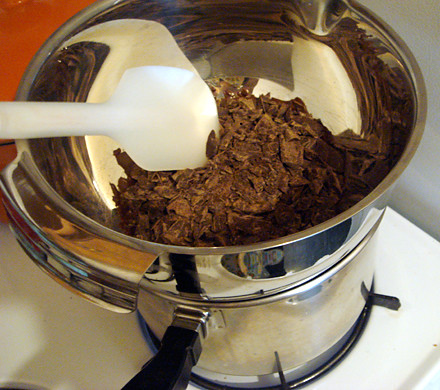
1. Cut up all of the chocolate that you'll be needing for the entire recipe.
:: 8 ounces semisweet chocolate for the frosting
:: 8 ounces semisweet chocolate for the cake layers,
:: 2 ounces for writing chocolate
:: 8 ounces white chocolate for the filling.
Store separately in ziplock bags until use. You can store this in the fridge or in the freezer if you're prepping a week or more in advance.
2. Make white chocolate filling and set aside in room temperature (overnight).
3. Bake the cake layers (you can store this in the fridge overnight as well). Just make sure you wrap it up well with plastic wrap/cling (don't cut the cake yet).
Day of...
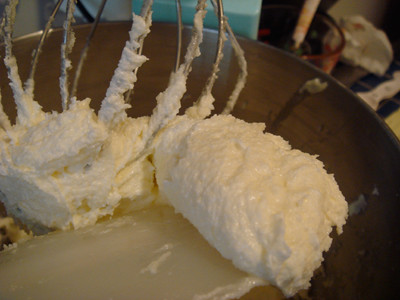
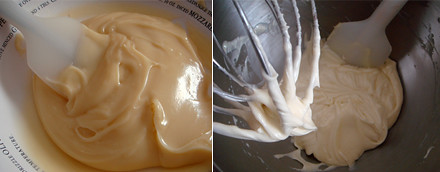
1. Finish white chocolate filling by whipping on high with a wire attachment until it triples in size (about 4-5 minutes) and gets lighter in color. Should be the consistency of softened butter.
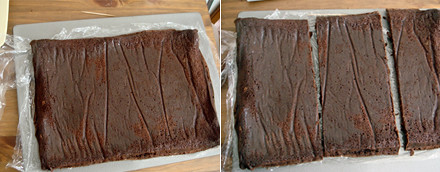
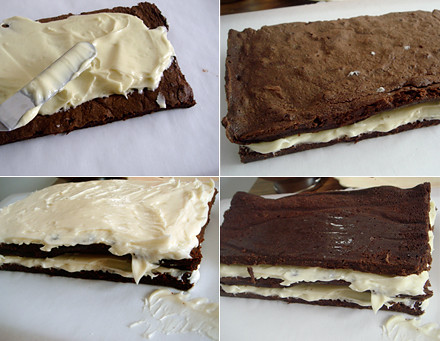
2. Take cake out of the fridge and cut into 3 equal sizes - then spread filling.
3. While you're waiting for the filled cake to set, start making the chocolate ganache glaze for frosting. Put 1/4 cup of it in the fridge. Set the rest aside in room temp.
4. Make White chocolate for Writing
5. Frost
6. Decorate
7. Chill for at least 3 hours before serving. Take out of the fridge 30 minutes before serving.
8. Enjoy you the fruit of your labor!
White Chocolate Filling
*To be made the day before
You'll need:
1/2 cup heavy cream
8 ounces white chocolate, finely chopped

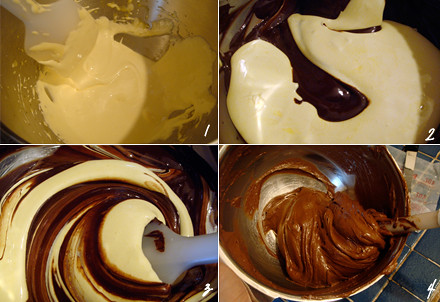
Heat up the cream over medium heat. Remove from the heat once you see bubbles and add the white chocolate. Wait 30 seconds then start stirring in the center in a quick but smooth clockwise motion. Stir until smooth and all of the chocolate has melted. Pour mixture into a bowl and cover it with plastic wrap touching the surface so "skin" doesn't develop.
The white chocolate filling (ganache) needs to sit out for at least 12 hours (preferably overnight) at room temperature (NOT IN THE FRIDGE).
Cake Layers
*To be made the day before
You'll need:
8 ounces semisweet chocolate finely chopped
1 stick (8tbs) unsalted butter room temp, chopped up in small cubes
5 large eggs, separated
1/2 cup plus 1 tbs sugar

Preheat oven to 300F degrees, place rack in the middle of the oven.
Lightly butter a 9" x 13" or quarter-sheet pan and line with parchment paper. Then lightly butter the parchment paper.

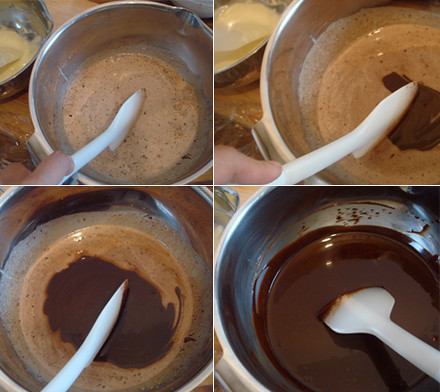
1. In a double boiler, melt the chocolate over low heat. If you don't have a double boiler, just boil some water in a pot and find a stainless steel bowl large enough to sit on top of the pot without falling or tipping over. The bowl should not be in direct contact with the water. Remove the boiler top when the chocolate is nearly melted. Continue to stir until completely smooth. Touch the chocolate with your finger to make sure that it isn't too hot, it should be cool enough to touch.

If so, you can begin adding the butter (divide the butter into thirds) little by little. Stir until no traces of butter remain. It should be glossy and smooth. You'll get an intense "chocolate truffle" aroma when the butter and chocolate successfully unite. If there is a heaven, I wonder if it smells like this?? Set the ganache aside.
troubleshooting tips:
Butter not melting? you might want to take the bowl and place it on top of the hot water (no flame) for a couple of seconds just to heat up the chocolate
Sauce getting too thick? same as above
Whip up 5 egg yolks in a mixer fitted with a whisk attachment. Whip the eggs with half of the sugar amount at medium speed increasing to super high until pale yellow and triple in volume (5 to 6 minutes). Remove bowl from mixer.

With a rubber spatula fold in the melted chocolate mixture into the whipped eggs. The mixture should be smooth and glossy (pale brown).
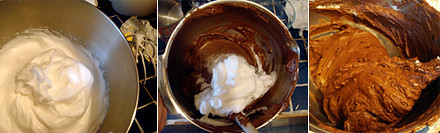
Clean the whisk and in another clean bowl begin whipping egg whites on med-high speed slowly adding remaining sugar. Increase speed to high and whip until the peaks are stiff and creamy.

First fold in about 1/4 of the egg white mixture into the chocolate mixture. Mix until no traces of white remain. Then gently fold in 1/2 of the remaining, mix until no traces of white remain. Fold in remaining egg white mixture and mix until no white traces remain. Just be careful because you don't want to deflate and lose the puff/height that the egg whites provide. Not quite sure how to FOLD?
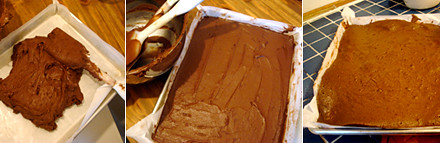
Spread the batter evenly into the prepared pan. The pan should be about 2/3 full.
Bake for 20-25 minutes. (My oven took about 30 minutes) The cake will rise above the edges of the pan and a light crust will form on top. A toothpick inserter in the middle will have a few moist crumbs.

Let the cake cool in the pat at room temp for 10 minutes. Once cooled, chill it for at least 4 hours or overnight - make sure you wrap it tightly with plastic wrap. This can also be frozen up to a week prior to assembly.
How to assemble the cake
First thing you should do is prepare the white chocolate filling. Place the filling in a mixer ready bowl and with a whisk attachment, mix on high until ganache is lighter in color and soft peaks form (4 minutes). Stop several times and scrape the sides of the bowl.

Remove chilled cake from the pan. I place my cutting board over the baking pan and then turn the whole thing over - that usually does the trick. Be careful, you don't want to break it. You want to cut the cake into perfect thirds (approx 4" wide each). Use a ruler if you have to.

Begin spreading the filling on your first layer. Spread half of the filling with a metal spatula. Top with a second chilled cake layer and then spread remaining ganache filling on that layer. Top with the last chilled layer.

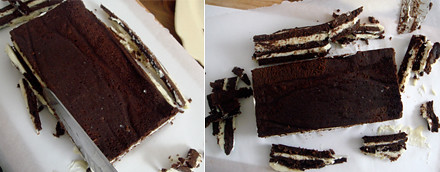
Using a thin sharp knife, trim the sides of the cake to make sure it's nice and even all around. Let it set in the fridge for at least 1 hour.

So now you can go ahead and make the Dark Chocolate Ganache Glaze recipe. Then make the white chocolate for writing recipe.
-------------------------------------------------------------------------------------------
Frosting (Dark Chocolate Ganache Glaze)
*To be made the day of (assemble day)
You'll need:
8 ounces semisweet chocolate finely chopped
1 cup heavy cream

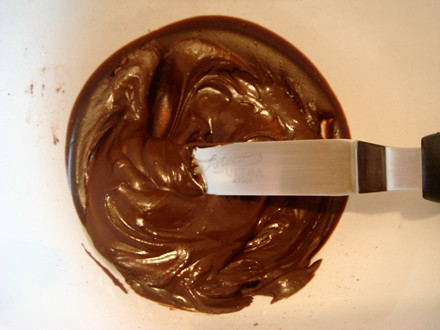
Chocolate ganache (frosting) is very easy to make. Just heat up a cup of heavy cream and once you start to see bubbles, turn the heat off and remove pot from the stove. Wait 30 seconds to a minute then pour in 8oz of finely chopped chocolate. Don't touch it for a minute. Then with a spatula, start in the middle and slowly turn clockwise. At first, it won't seem like anything is happening, but you'll soon start to see the chocolate. Keep mixing until the mixture is smooth.
Chill 1/4 cup of the sauce in the fridge for about 25 minutes. Leave the rest out in room temperature, stirring every so often. It should thicken slightly and should ribbon off the end of a spatula.
-------------------------------------------------------------------------------------------
White Chocolate for Writing
*To be made the day of (assemble day)
You'll need:
2 ounces white chocolate, roughly chopped
2 teaspoons vegetable oil
You'll also need a toothpick or a bbq stick (decorating part)
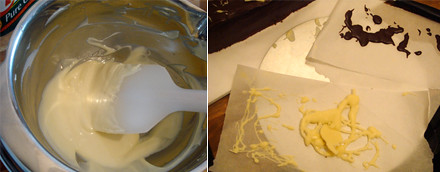
In a small bowl over simmering water, melt chocolate. Remove from heat and add vegetable oil, stir until smooth. Set aside. You're going to need a parchment paper cone. If you don't know how to make paper cones, read this how to or watch this video. Make sure you have your cone ready because the decorating part needs to go as fast as possible.

-------------------------------------------------------------------------------------------
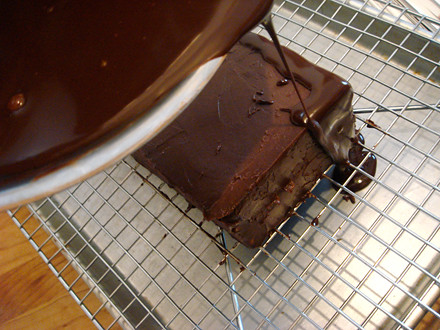
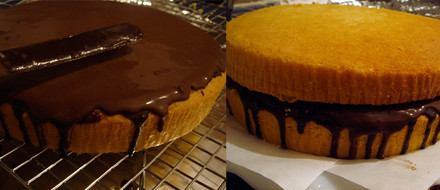
Once the filled cake has chilled for at least an hour, remove it from the fridge and place it on top of a cooling rack or pouring rack positioned over a rimmed baking sheet.

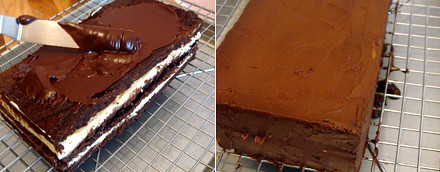
With an offset spatula, thinly coat the top and sides of the finished cake with the 1/4 cup chilled chocolate ganache glaze.

Because the cake is chilled, the chocolate should harden a little - giving it a really good base for the rest of the unchilled glaze.
Now for the hardest part (at least I think so).

Pour some white chocolate (for writing) into your parchment cone. Lay it on it's side or in a bowl so it doesn't start to drip everywhere. Set aside. Get your toothpick ready.
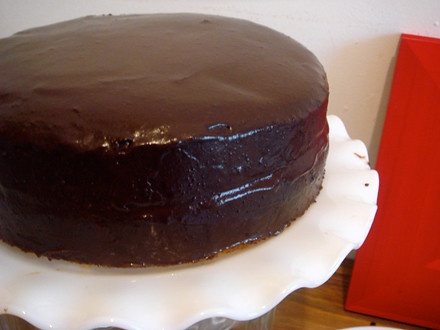
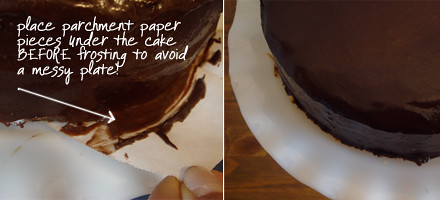
It's easier if you use a bowl or a measuring cup with a spout, but you're now going to SLOWLY pour the rest of the glaze all around the sides of the cake, being extra careful to cover all the corners and every single centimeter of the cake. Make sure you leave some glaze for the top. After you're done with the sides, pour some on the top and using a metal spatula spread the glaze evenly on top.
Quickly (you need to do this quickly before the chocolate sets), pipe 3 thin white chocolate parallel lines 1/4" apart lengthwise down the middle of the cake over the glaze. Working quickly, with a toothpick draw small figure eights crosswise through the ganache and white stripes all aong the cake's length. That's how you get the swirls. I had a really hard time doing this. The first time I made the cake, I had to do away with this entire step and just piped white chocolate lace-like shapes on a parchment paper lined baking sheet and chilled them until they got hard. I then topped the cake with the different shapes and I called it a day.
Chill for 1 to 2 hours to set. Remove 30 minutes before serving. This cake stores beautifully and lasted for about 3-4 days in the fridge.

I was able to get the swirls my second time around - still not perfect though!

This was my first shot at it.
Good luck!!!!