
Defeated by a tree pretending to be a shrub
One of our biggest projects this month (#2 on the master TO DO list - I'll tell you about #1 next week!) is to re-do the front lawn. Our realtor told us that there are two types of buyers, those who can see potential and those who take one look at a disaster zone and run as far as they can. Well, lucky for us I'm the former. My first apartment (before 524) was a disaster zone and we ended up knocking down walls, redoing the kitchen, installing new doors etc. I guess you could say, I love home projects (until I start them and realize I've bitten more than I could chew).
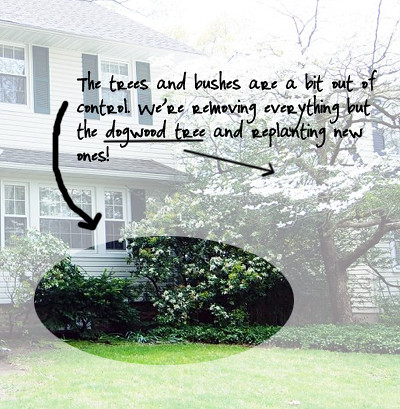
So back to #2 - so I'm working with a landscape designer who is helping me redesign the front. The only problem is, I'm not sure if we're going to be able to afford to do EVERYTHING in the plan. Seriously, who knew trees started at $400 each??? She's even included a sweet bench in the plan. I'm trying to go for an English Cottage feel - intimate, whimsical, not too manicured.
So since we don't have much money for the project, we've decided to do all of the execution ourselves. So all of the shrubs and trees need to be removed. In theory it all sounded feasible until...
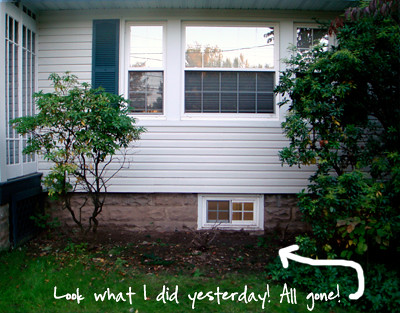
So now time to remove the roots out of the ground.

So other than the roots still being in the ground, my first gardening/landscaping day was pretty successful - despite my achy back, neck and right hand.
![]()


3 comments:
it's looking good already...not that it was bad at first....you are brave....one thing be careful with anything that has BLADES!!!!
Love your blog, especially cooking posts. Excited to see more gardening posts. All that digging should even out the stairs you're not climbing.
Maybe doing a hard trim on some bushes would be easier? Many do return looking better, more full of blossoms when they return and you can then control the shape.
Start with small trees. The saying about plants is "The 1st year they sleep, 2nd year they creep, 3rd year leap."
My MIL lives in England and has the most fantastic & big typical English style garden. All done herself. She's got Martha beat!
When it comes to installation, DIY. Take it slow, enjoy the seasons, learn about your soil type, research plants before you buy, don't be afraid to move plants, find a high quality nursery with friendly and knowledgeable staff in your area and enjoy the rewards as the seasons pass.
Be sure to plant some bulbs, it's the perfect time of year for it. Have fun!
Tiffany
http://tiffanyandink.blogsite.org
Tiffany, thank you!! We just spent the whole day clearing out shrubs and a few scraggly trees (all by hand, no power tools!) - it took forever to dig the roots out!!! Thank you so much for the tips, I appreciate it. I'll definitely keep posting pics of our progress.
Post a Comment